


To celebrate this great exposure to my Screen Door design, I am offering BLOG CANDY!
Blog Candy Rules:
I'd like to share with you the Screen Door Kit - what you get and how to use the template. Let's start with first things first. This is what it looks like:
What is a Screen Door Card kit? Well, you will receive a chipboard template to make your very own Screen Door "cut out" for as many applications as you can think of - cards, scrapbook pages, home decor. The only thing I ask you is that you don't use it to enter contests, etc. Please give proper credit if you want to sell it (yup, I'm an Angel with a Policy)!!!
OK, next my kit includes what I like to call enough supplies to make one card. An A2 cardstock card folded for a right to left opening, the inside door template to use trace and cut out using your craft knife for the opening. A brad that coordinates as best as possible! I even include a peice of vinyl screening my husband bought for me at The Home Depot (I think?)! And of course, the instruction sheet - most importantly!!!
The only thing not included is a stamped image that would work perfect for outside the Screen Door. This is where your stamp stash comes in!!! Sometimes I like to imagine what is on my front porch right now...swing, pumpkins, Mums and a bench (and if the kids have been out there, well......)! If you are like me, there are just so many stamps that have not been used in this application - but no worries - they will be used anytime now, I promise! Here is a display I made to feature the Kit at my church craft show! What is a template only? Well, it's where you would get exactly that just the A2 Screen Door template as well as the Inside Door template - you would supply the cardstock as well as brad & vinyl screening.
Here is what the process looks like when I put one of my cards together - it's not as daunting as I am sounding! Seriously!
Step one: Trace Screen Door template on cardstock - coordinate your door and your card front. Step two: Using craft knife, cut out Screen Door from cardstock.
(Tip: I've never tried the metal/wire version did not want to figure out how to adhere the metal to paper thing!) My favorite is the Terrfically Tacky Tape by Provo Craft - this stuff ROCKS!!! Step three: I used the Inside Door template to trace the cut out using a craft knife. I usually center as best as possible - but I did measure and my lower right corner of the opening is about 1" from the lower right corner of the card front! Then with a steady hand, cut out.
Step four: Next I trim the vinyl screen peice to fit the Screen Door approximately 1/8" smaller than the door. Step five: First layer of TTT goes on the back of the Screen Door on the outer edges only! This makes the vinyl adhere quite securely! Believe me, I've tried almost every glue and tape out there and NOTHING else works!
 Step six: Using another layer of TTT goes on top of the first layer, the only difference is that there is vinyl screening between the layers. Again, stay only on the outer edges ONLY. I know you want to put the Screen Door over that opening - BUT WAIT!!! Using a 1/16" circle punch or a paper peircer, get a hole in the spot where a door knob would go, then secure your brad. It's just a nice touch to hide that brad backing - a clean look!
 Step seven: OK, now put that Screen Door over the opening on the card front! Yea!!!!
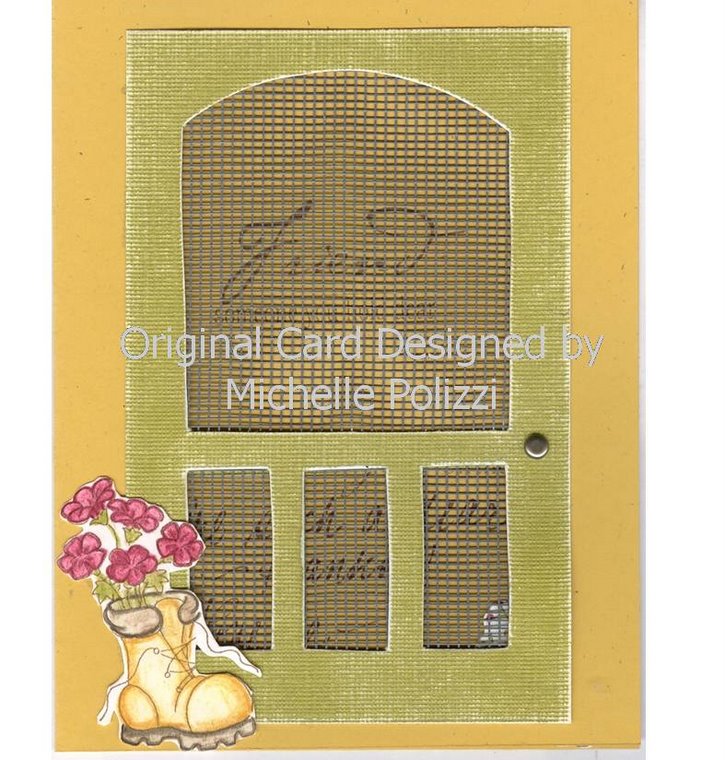
 Here is a look from inside the card - yup, you can see thru it! That is the idea!
 Step eight: Now get a sentiment stamp and position it so you can "read" it thru the door - it's what I call the Screen Door card welcome - just like a wreath on your front door @ home! The "home-y" touch we all want!!! Right?
Tada!!! It's finsihed - except for that stamped image you can add anywhere on the card front. My next post I will share some more card samples (see the left sidebar for a few more) you can see for yourself of the card possibilities!!! I have tons of ideas but I am always short on time, and heavy on responsibilities!!! Thanks for looking!!!
Prayer is the key to Heaven, but faith unlocks the door. http://thinkexist.com